DIY Jeans Refashion Ideas

Have an old pair of plain jeans that need some new life?

Here is some inspiration for DIY refashions you can do to spruce that pair of denim. Get your scissors, needles, thread and/or Beacon Fabri-Fix Fabric Glue ready! You can add printed fabric, lace trim, jewels, paint, embroidery...all sorts of embellishments. Now these are mainly ideas for the ends of the pant legs like cuffs but you can add details to just about anywhere on your jeans. Make them your own and make them stand out.

1. Cut out and weave other fabric through
2. Sew on colorful rhinestones
3. Hand embroider your own designs
4. Add metallic and patterned trims
5. Brocade silk fabric cuffs
6. Side split with fabric insert
7. Add embroidered floral appliques
8. Cut out the denim and stitch outlines
9. Split open sides and add in different colored denim
10. Split open sides of wide jeans to get breezy almost flared jeans

11. Hand paint all kinds of designs

12. Add grommets and ribbon
13. Cute bunny cuffs
14. Add embroidered floral mesh fabric for sheerness and flare
15. Shiny sequin fabric cuffs

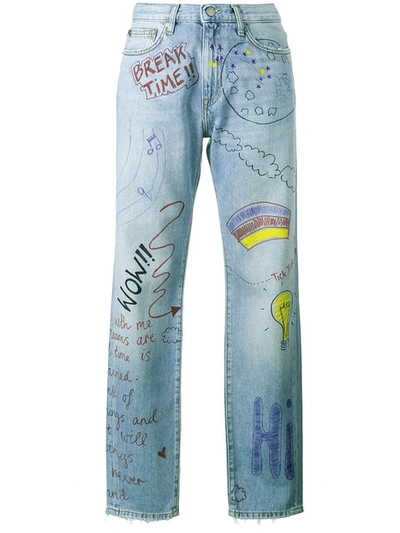
16. Take a permanent marker and doodle

17. Add pom-pom fringe trim
18. Add flower and pearl details
19. 2 in 1 upcycled a skirt and pair of jeans to give them plenty of flare (tutorial by DIYbohemian
20. Add lace


☮♥♻

Refashion | An Old T-Shirt + Scrap Piece of Fabric


thee inspiration:


Giving color and pattern to a solid comfy t-shirt, looks simple enough to me. I had this bright red-orange tee and a remnant of fabric leftover from this wrap and tie pantskirt I made. This fabric piece just goes so well with the shirt. It was meant to be.

First I did was mark how high I wanted the center back. I basically made go to where the front neckline is. Then fold the shirt in half, with side seams meeting in the middle. Create the shape you want for the front and back "v"s. Well I guess the back is more curved than a "v" but you get it. I had the front "v" end right above the belly button.

Once that was cut out (leaving a 1/4" seam allowance) I took my scrap piece of fabric, evened it out and sewed it in half lengthwise. The piece was 37.5" long by 30" wide so 15" when folded in half.

I have a similar shirt that I like the back length of so I used it as a reference. Within this piece of fabric I was able to get both front and back pieces. Starting with the top back curve.

Then the front after the back is all cut out. Make sure the width is the same as where it meets up on the sides. After that I had it flare out some since this fabric doesn't stretch like the t-shirt does.

So the seams on the fabric will end up in the middle and should then be sewed to your t-shirt. I did the front first then the back.

I wanted the front middle corner to line up exactly with the middle seam of the fabric. It was a little tricky but got it eventually.

After the front is attached to the front and the back to back you can serge the raw edges. Then you can attach the sides together and serge those. After all that even out the bottom a bit, get it how you want and hem it.
All done!

Renew & reuse!

☮♥♻

In thee shop: Upcycled Denim (and clothing) Canteen Circle Bags


All bags are made with upcycled denim and other clothing. They are zippered with pockets inside and out. The strap is adjustable as always.


These took a bit to finish . I started them a couple months back but they're listed in the shop now and ready to ship! You can check out the bags, here.

☮♥♻